First of all I am going to again say that I am an not an expert (as may be obvious to some). I am an enthusiast who knows enough to possibly be dangerous. I welcome and appreciate any insight on any oversight. I am trying to keep a straightforward and hopefully thoughtful record of my endeavors, successes and setbacks. I hope someone out there finds it useful if not sort of interesting and amusing.
That said, secondly, I would like to apologize for all the ugly arrows.
It didn't occur to me to start taking pictures until after I had already removed the engine. I wish I had documented all of the individual cable connections. I will be sure to do that when I am replacing them.
The blue arrow points out the clutch cable. Green points out the two gear shifting cables. One pushes, One pulls, One Handlebar controls them all. Yellow is the rear brake cable. Orange is the electrical wiring harness. Black is the throttle cable and White is the choke cable. I disconnected all of these before removing the engine.
The red arrows show the mounting points for the engine. The hole in the body has a matching hole on the other side of the body. The engine has a mounting bar that fits between them and a long bolt which creates a hinge allows the engine to swing up and down. The rear mount is at the bottom of the shock. That's it. Once those bolts are pulled, the engine comes right out.
The engine and wheel pull away as one unit. You can see the mounting points to the left of the shifting box and all the way to the right above the end of the kick starter. The snail shell spiral look of the engine pleases me to no end.
A grimy shifter box.
There was a beautiful gross patina of oil dirt and (sorry) neglect covering the whole lower side of the engine. I probably should have dealt with that somewhat BEFORE I jumped in to pull the engine but lesson learned: Clean it up a little first.
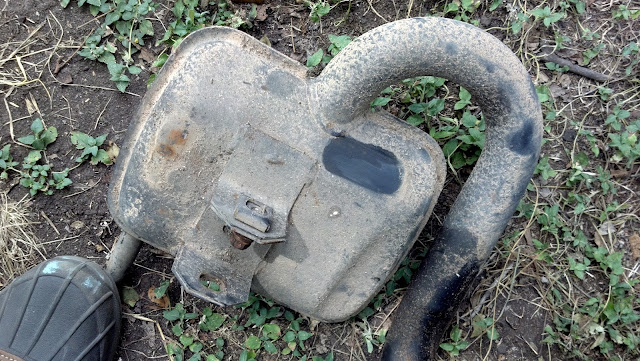
I started by pulling the muffler. It was only held on by a single bolt underneath. It had already been disconnected from the engine. It looked a little rough but with a little sweat dabbed from my forehead (hot day in Texas) I wiped a spot clean and saw this was all just dirt. I hosed it down and it looks pretty good.
The red arrows point out the clutch lever and the cable adjustment nut. The green arrows point out the rear brake lever and cable adjusting nut. The blue is the Piaggio engine ID. The yellow arrows point out the fine gross oil/dirt/dreams/neglect patina I mentioned before. You don't want to see this side of the engine all that often. File that under "Keep the rubber side down".
The same color legend applies to the arrows in this "Hey I cleaned it Disco Sidelight" remix. Above the blue arrow you can see the exhaust port coming out of the bottom of the cylinder barrel.
To clean this up, I used compressed air to blow off any loose debris. This did about 3/4 of the work. After that I used an old toothbrush, spray carb cleaner and an old towel to remove the thin oily film that the compressed air just pushed around. As you can see from the yellow arrows that I am not done with the cleaning process but it's at least tolerable to bring inside to be worked on.
Once again, not a view you normally want to see on a well running scooter.
The reason again for removing the engine is to remove the cylinder and seized piston to be replaced/upgraded with a nice clean 150cc kit. Once I removed it, the piston arm was able to fully extend. This video shows how far it can travel. The easy and free movement is very encouraging as it means the engine itself is in pretty good condition.
The plate with the copper-wound coils is the stator. This translates the movement of the engine into electricity. I wrapped the electrical box on the upper left with blue tape. This is where the electrical connection comes out of the engine. This older scooter has a 6V electrical system (unless it's been changed and I am not aware yet). I am going to look into converting this (and my other Vespa projects) to a 12V system which will allow for a battery, brighter head/brake/turn lights (LED conversion, I am no purist) and other possible accessories such as GPS unit, MP3 player, running lights and cappuccino machine.
It IS an Italian bike after all.


No comments:
Post a Comment